REFURBISHING THE NAUTILUS MINISUB
~PAGE
THREE~
RECAP: In 2001, I began completing the exterior
detailing of the Nautilus Minisub for a Discovery Channel documentary
about Jules Verne. When that deal fell
through, I started building functional replicas of the diving gear seen in 20,000
Leagues. Next, I considered adding a
jetski drivetrain to the sub. I assembled all the necessary parts, but
scrapped the project after determining the pump wouldn’t provide the desired
performance in a submerged application. Then, a physical injury forced me to
sideline the submarine for three years.
By mid- 2008, I was back at work, but the rest of that year involved
catching up at my “real job” and doing physical therapy. By mid-2009, I was again ready to refurbish
the Nautilus; but first I needed a better shop.
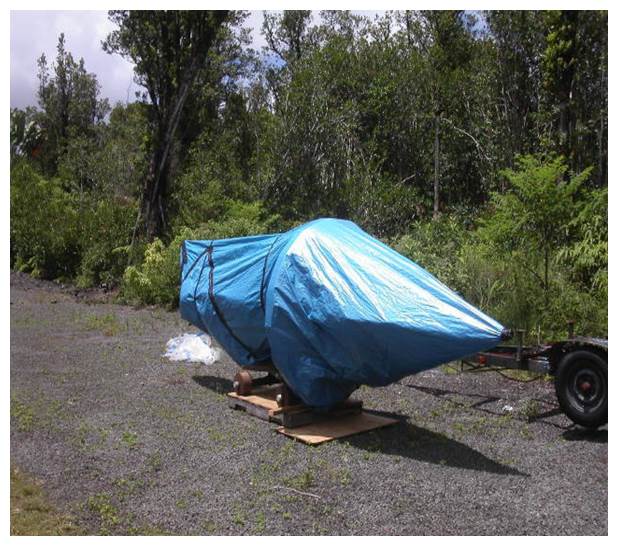
September 2009: Nautilus Minisub in temporary outdoor storage,
wrapped in plastic sheeting and tarps.
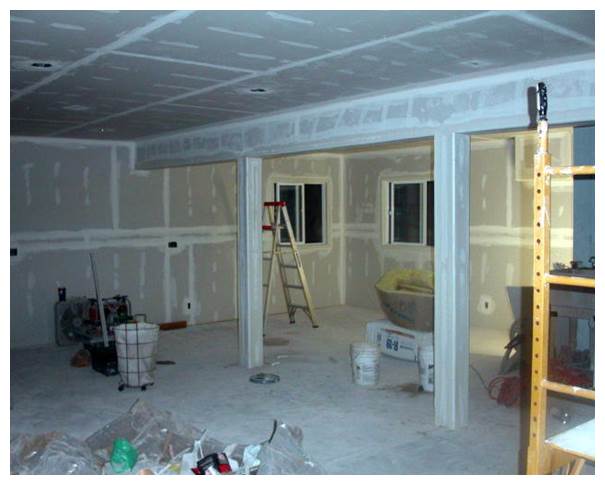
November 2009: New shop under construction.
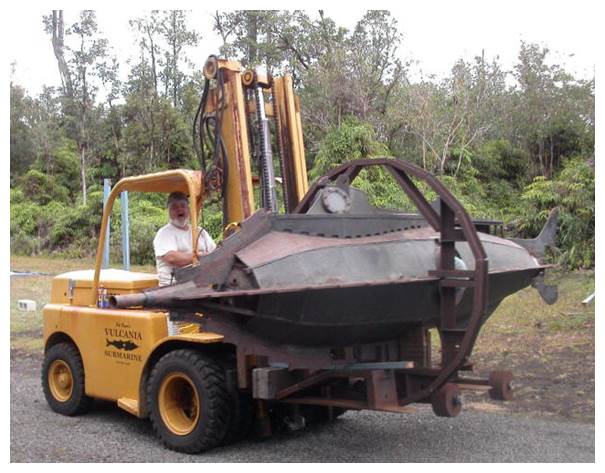
January 2010: Bringing the Nautilus back to the shop on our Hyster
forklift.

February 2010: Nautilus Minisub on new floor dolly, ready to be
positioned on new roller cradle.
There’s much to do, but at least the renovation is underway again
at last! J
On the previous REFURBISHING page,
you’ll see that I built some air blower units to ventilate the pressure hull: handmade
from steel, and powered by Chevrolet truck 12-V heater fans. They work really well, but are physically
large and draw a lot of battery power.
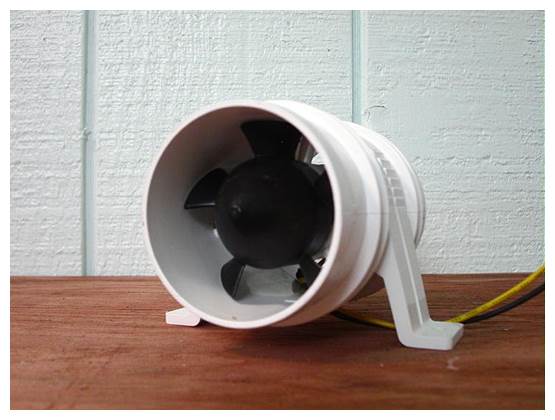
Now we’ll be using these commercially-made marine bilge blowers instead. They are smaller, quieter, and more energy
efficient, while still providing more than adequate air flow.
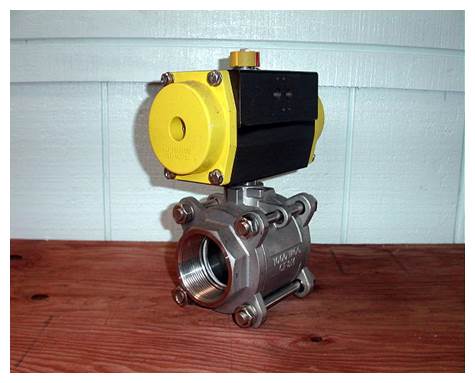
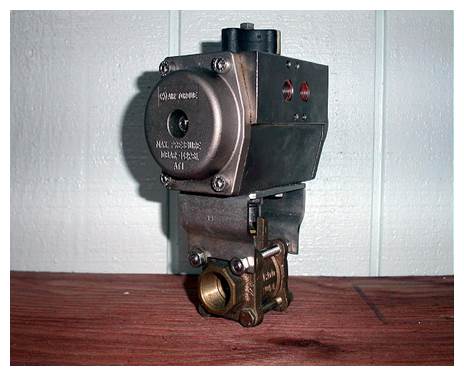
I’m also installing pneumatically actuated valves in some remote locations to facilitate normal operations. Mechanically-linkaged units will still be included as emergency backups where necessary.
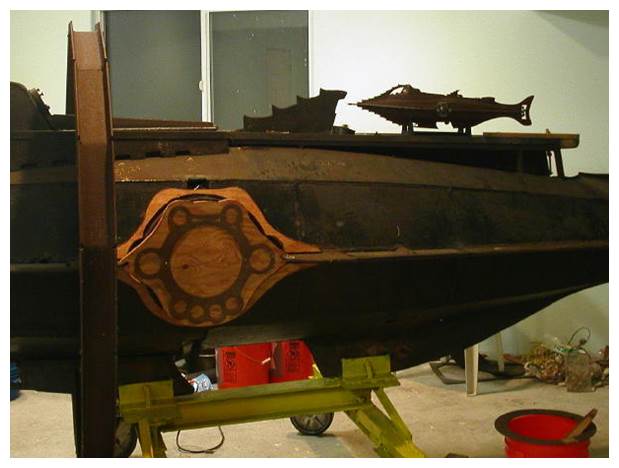
I’m working on several areas of the submarine simultaneously: systems, detailing, etc. Here’s a look at the wooden salon window fairing frame templates, as-is / so far. The actual fairing shells will be handcrafted from metal to replicate the plating on Disney’s 11-foot SFX model. (That’s one of Scott Brodeen’s outstanding 31” Nautilus replicas on the aft deck: there to give friends who visited the shop today a general idea of what the scale exterior detailing would look like when finished.)
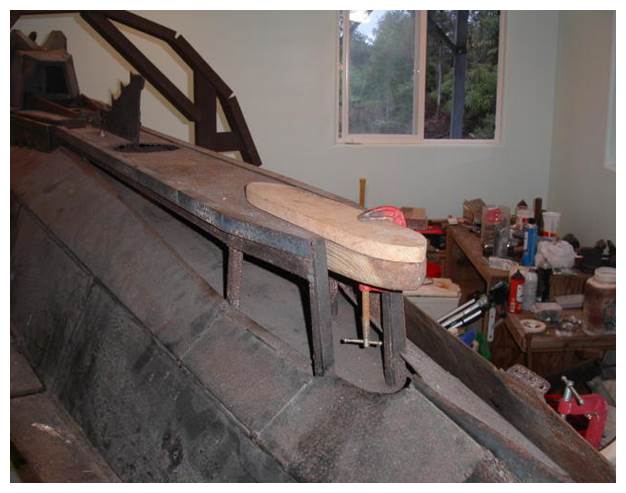
I’ve also started on the aft deck and skiff area. Here you can see the basic wooden template for the skiff, temporarily installed with a C-clamp while I cut and form the adjacent structures and plating. Like everything else on this submarine, the skiff will be handcrafted from metal.
New! Sunday, March 06, 2011. Okay, so let’s get into it: just exactly what’s wrong with the Nautilus Minisub, anyway?
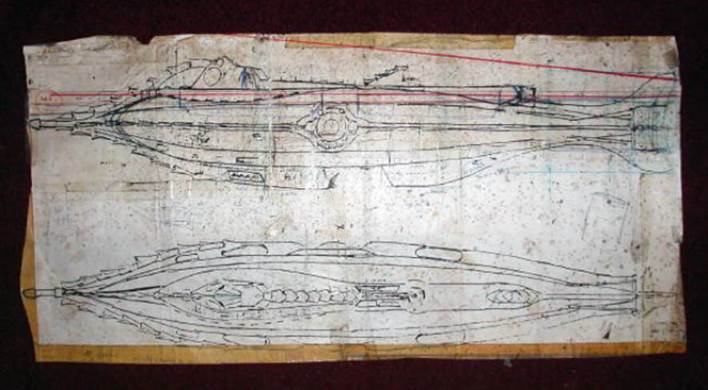
First of all: when I built the submarine, my complete library of graphic references consisted of a few photographs taken of a TV screen while the movie was on; and a set of incomplete plans. Working on guestimation, I had to draw in the area from the lead rakers forward, the skiff area, and parts of the tailfins. These were the best references I could get at the time.
The photo below shows the boat as tested in 1991, and was labeled to illustrate the improvements that needed to be made.
One problem here is photographic distortion: the parts of the sub that are further away from the lens (the extremities) look smaller than those closer-in (amidships). This tends to give this image a “fatter” appearance than the boat really has. But, keeping it honest, there are some actual discrepancies that contribute to that impression of obesity, too.
(Adnote: Saturday, August 18, 2012 Lately, I hesitate to use the words “right” and “wrong” when it comes to the Disney Nautilus, because over the years, some Nautilus modelers online have turned that into something political that I don’t subcribe to and don’t want to be confused with. But I’ll be using those words here to describe my own work, so I thought I’d give that a context.
For the record: I don’t refer to the 11-foot SFX filming miniature as definitive, because it isn’t. As a filming miniature intended for “distant” scenes, its builders allowed discrepancies and contradictions that wouldn’t be noticed; and thus, when it comes to scale exterior details, in many instances, the full-sized deck sets are a better, more credible reference.
Admittedly, the Hero is the best reference in many instances; but not all. So it can’t be definitive.
But if “the Hero” isn’t the definitive Disney Nautilus, what is?
The fact is: there is no definitive Disney Nautilus. She’s at least all we see onscreen, and that’s more than just the 11-footer. And taking this stance does not mean I don’t care about visual accuracy: in reality, it means that I do.)
That said, I’ve pointed out areas numbered 1 through 20, that have always been slated for exterior detailing toward a Nautilus replica faithful to what’s seen in the movie: 11-footer or otherwise.
If this list sounds like a comedy of errors, remember: this project happened decades before the online arguments about rivet counts and screw-heads in the scuppers began, when nobody had ever built a sub like this, and I was figuring it out as I went along. Thank you. J
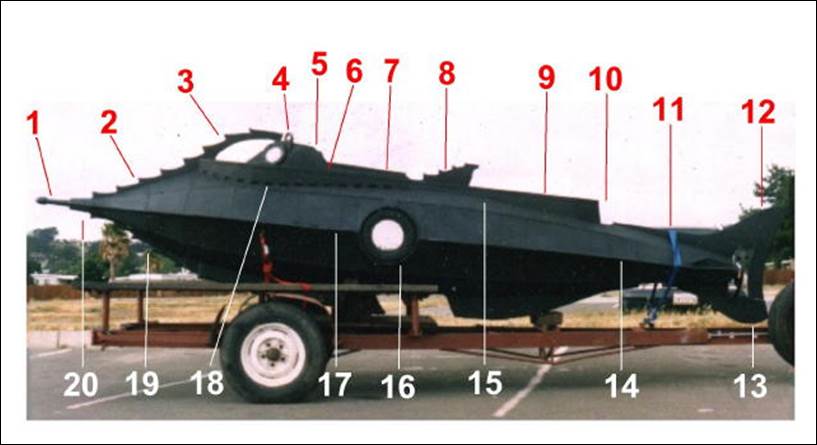
1. The ramming spur is too short and incorrectly shaped. Reason: there wasn’t one on the incomplete copy of the Disney plans our local librarian Xeroxed from the 1984 Cinefantastique magazine article by Frazier and Hathorne.
2. The shape and number of rakers is wrong. Reason: project size meant “direct plans tracing” was not an option. We made our parts templates freehand by extrapolating dimensions up from the Xeroxed working plans. And, I made the mistake of measuring from the internal pressure hull, and not taking into consideration the additional thickness of the external ballast tank and free-flooding hull. (In the case of the upper rakers: the templates were made in two parts, and I overlayed them wrong, producing eight rakers instead of seven. Didn’t even notice it until later. Duhhhhh! J )
3. The arch has that “scaredy cat” look of the published Disney plans. Reason: none. I did my best to freehand enlarge the plans.
4. The “alligator lights” are only frames for the reflectors. Reason: We planned to do the housings as part of the wheelhouse cover.
5. The wheelhouse looks too small. That’s another thing that makes the hull look too fat in comparison. Reason: that’s because we’re looking at the pressure hull built for the Hypersub. For the Nautilus, it was always my intent to build a scale wheelhouse cover for that part of the pressure hull after the boat was proven functional.
6. The foredeck is about ½” too tall. Reason: none. I thought it looked right according to the plans. There’s also a problem with the angle of the top outer hull surface: see #15, below.
7. The ventilator section is two inches too short. Reason: This is the hatch coaming for the Hypersub. At the time, I hadn't thought to convert it into a Nautilus, so I didn’t consider the additional length of the scale Wheelhouse cover.
8. The dorsal fin is two inches too far forward. Reason: see #7 above.
9. The aft deck appears too short. Reason: the skiff bay (and skiff) have not been added yet. That metalwork was intended as part of the post proving test refinements.
10. The skiff bay and skiff are missing. Reason: see #9 above.
11. The cutwater between the skiff bay and caudal tail fin needs 1” additional metal and recurving to meet the skiff bay correctly. Reason: see #9 above.
12. The caudal tailfin needs a strip of metal about ¾” wide across the top, and recurved to match the 11-footer. Reason: the non-direct method by which the working templates were freehand extrapolated up in scale from the published plans.
13. The bottom tailfin needs a strip of metal about ¾” wide across the back, and recurved to match the 11-footer. Reason: the non-direct method by which the working templates were extrapolated up in scale from the published plans.
14. The aft horizontal fins are too two-dimensional. Reason: the additional “skins” were part of the planned post proving test detailing.
15. The upper hull surface (leading to the deck) is at too shallow of an angle: resultantly, the side walls of the deck are too tall. Reason: the plans we worked from only had elevation and plan views: no “end views” to show the angle of that piece, so we estimated as best we could, but missed by a couple degrees.
16. The salon window fairings are missing. Reason: this was intended for the post proving test scale detailing.
17. The forward horizontal fins are too two-dimensional. Reason: see #14 above.
18. The side of the fore deck (and scupper area) is too tall and not inclined inwards enough. Reason: see #6 and #15 above.
19. The lower forward raker fin needs to be “S-curved” in more. (This greatly adds to the “overweight” appearance of the hull.) Reason: see #2 above.
20. Some say the bow “cone” needs to be curved upwards 2 degrees. That characteristic makes no sense from an engineering standpoint and was done on the 11-foot filming miniature for photographic reasons of perspective peculiar to filming small scale models. Furthermore, the original Goff Nautilus model and design had no such upsweep. I am convinced Goff never intended a real Nautilus to be so configured and I am not compelled to copy that eccentricity in my functional submarine.
IN SUMMARY: the greatest variance is at the bow (where we had no reference because our plans were incomplete) and even then, it’s only short by 3” or 1.35%. The location of the dorsal fin (2-inches forward because, without a scale wheelhouse cover, I measured from the pressure hull canopy) was only off by 0.9%. Overall, those two areas represent an average variance of only 1.125%.
So: 25 years ago, working in a space so small that I couldn’t step back far enough to photograph the entire sub in one shot; and working without the benefit of good graphics, accurate plans, or the “direct plans tracing” method used by most scale modelers today; I produced a functional steel Nautilus replica that was accurate in most respects; and 98.875% accurate at its worst two points!
All things considered, I don’t think anyone can reasonably say that Corporate Disney was wrong when they pronounced this boat “a visually accurate representation of the Disney Nautilus.”
Now: addressing the above-mentioned discrepancies and the addition of scale details like the rivets, anchors, hatches, dome windows, a skiff, vents, and such, should produce a Nautilus replica comparable with the best scale models around.
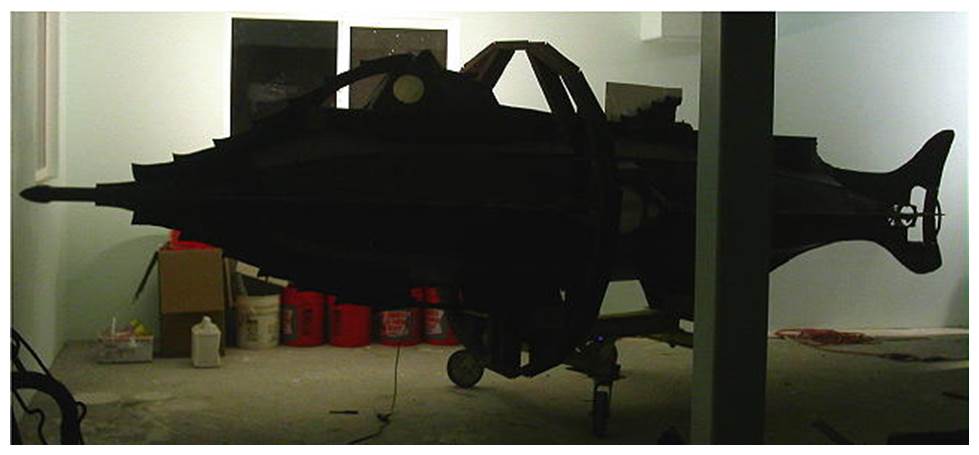
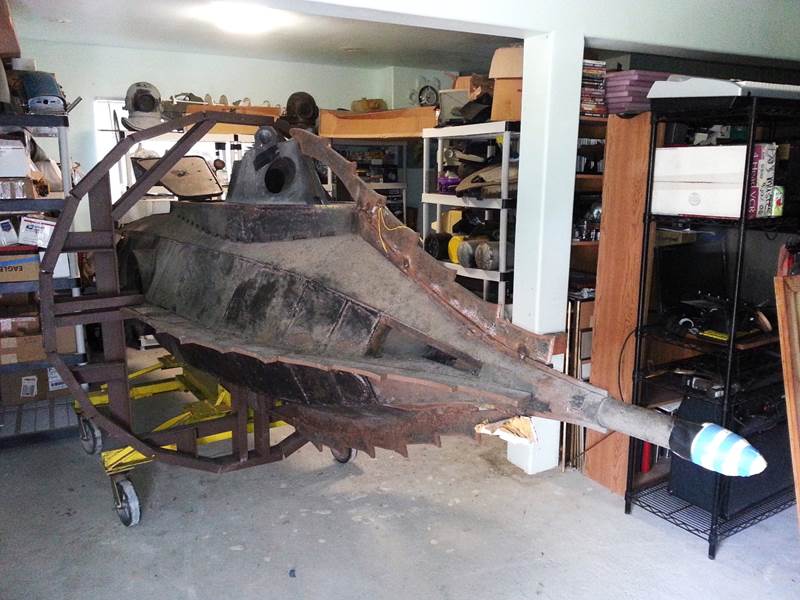
That said, above is a look at where we’re at with her lately. The top rakers have been relocated, but the bottom ones still need to be readjusted. The dorsal fin is templated, but needs to be 2 inches aft of where it presently sits. The templates for the salon windows, aft deck / skiff area, ventilator section, and wheelhouse are nearly complete, and I’ll be making those parts out of metal.
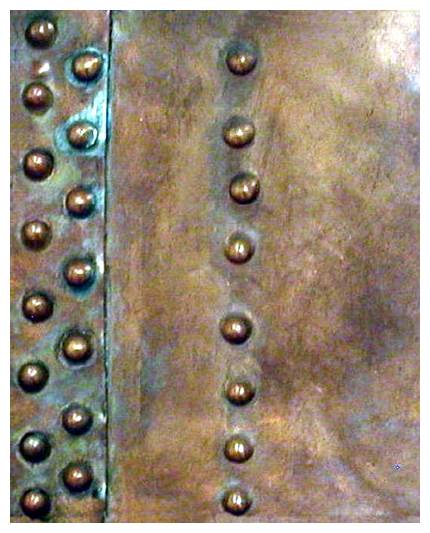
My original plan to produce the rivet detail (with hemispherical acrylic cabochons under a simulated rust paint job) have been scrapped. Now, the entire submarine will be clad in sheet brass or copper with embossed rivets, and the metal will be allowed to naturally patina with age. Above is a test piece showing the rivets and seam lines. Imagine the entire submarine looking like that! J
NEW: Saturday, August 18, 2012: Working on many projects. For the Nautilus Minisub, I’m still doing the metal clad / embossed rivet covering; but I’m back to thinking she should get the traditional rust paintjob, or something akin thereto.
Also, we’re doing functional iris windows. Should have some pics of that soon.
NEW: Tuesday, February 07, 2017: Today, for the first time since 2009, the Nautilus Minisub left storage and is back on the active worklist. She's rusty, dusty, and dirty; but that's nothing that a sandblaster can't fix. Big plans for the Ol' Gal. Lots more to follow. I'll have to start a "Refurbishing 4" page. J
Hang loose for
more updates as the project progresses.